3.Preparatory matters
3.1 Preventive measures
1. When measuring under sunlight, avoid aiming the objective lens directly at the sun. If working under the sun, a filter should be installed.
2. Avoid storing instruments at high and low temperatures, and also avoid sudden temperature changes (except for temperature fluctuations during use).
3. When the instrument is not in use, it should be packed in a box and placed in a dry place, paying attention to shock, dust, and moisture prevention.
4. If the temperature difference between the working area and the storage area of the instrument is too large, the instrument should be left in the box until it adapts to the ambient temperature before use.
5. When the instrument is not used for a long time, the battery on the instrument should be removed and stored separately. The battery should be charged once a month.
6. The instrument should be transported in a box, and care should be taken to avoid squeezing, collision, and severe vibration during transportation. For long-distance transportation, it is best to use soft cushions around the box.
7. When installing or disassembling the instrument onto a tripod, hold the instrument with one hand first to prevent it from falling.
8. When exposed optical components need to be cleaned, they should be gently wiped clean with degreasing cotton or lens paper, and should not be wiped with other objects.
9. After using the instrument, use a velvet cloth or brush to remove dust from the surface of the instrument. After the instrument is soaked in rainwater, do not turn on the power. Use a clean soft cloth to dry it and leave it in a ventilated place for a period of time.
10. Before starting the homework, the instrument should be carefully and comprehensively inspected to ensure that all indicators, functions, power supply, initial settings, and correction parameters of the instrument meet the requirements before starting the homework.
11. Even if abnormal instrument functions are found, non professional maintenance personnel are not allowed to disassemble the instrument without authorization to avoid unnecessary damage.
12. TAS-Z6 Robotic Total Station emit laser light and should not be aimed at the eyes during use.
13 . Keep the touch screen clean and do not use sharp objects to wipe the touch screen.
3.2 Instrument unboxing and storage
Open the box
Gently lower the box with the lid facing upwards, unlock the box, open the lid, and remove the instrument.
deposit
Cover the telescope mirror with the circular level on the base facing downwards and place the instrument flat in the box. Close the box cover and lock the locking bolt.
3.3 Placement of Instruments
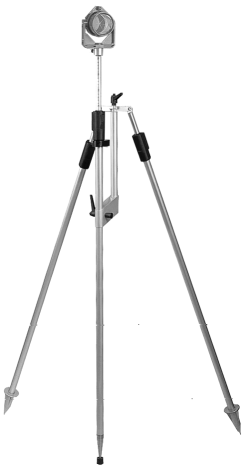
Install the instrument on a tripod, accurately level and align it to ensure the accuracy of the measurement results. A dedicated center connected spiral tripod should be used.
Operation reference: Instrument leveling and alignment
1. Using a plumb bob for centering and leveling
1) Place the tripod
① Firstly, open the tripod so that its three legs are approximately equidistant and its top surface is approximately horizontal. Tighten the three fixing screws.
② Make the center of the tripod approximately on the same vertical line as the measuring point.
③ Tighten the tripod to firmly support it on the ground.
2) Place the instrument on the tripod
Carefully place the instrument on the tripod, loosen the central connecting screw, gently move the instrument on the head of the tripod until the hammer ball aligns with the center of the measuring station mark, and then gently tighten the connecting screw.
3) Using a circular level to roughly level the instrument
① Rotate the two foot spirals A and B to move the bubble of the circular level to a straight line perpendicular to the centerline of the two foot spirals mentioned above.
② Rotate the foot spiral C to center the bubble of the circular level.
4) Using a long leveling instrument for precision leveling
① Rotate the instrument to make the tube level parallel to the line connecting a pair of foot spirals A and B. Rotate the foot screws A and B again to center the bubble of the tube level.
② Rotate the instrument 90 º (100gon) around the vertical axis, and then rotate the other foot screw C to center the bubble of the tube level.
③ Rotate 90 º again and repeat steps ① and ② until the bubbles are centered at all four positions.
2. Using optical centering device for centering
1) Set up a tripod
Extend the tripod to an appropriate height, ensuring that the three legs are of equal length and open, and make the top surface of the tripod approximately horizontal and located directly above the measuring station. Support the legs of the tripod on the ground to secure one of the legs.
2) Install instruments and control points
Carefully place the instrument on the tripod, tighten the central connecting screw, adjust the optical collimator to make the crosshair image clear. Grasp the other two unsecured legs with both hands and adjust their positions by observing the optical pointing device. When aligning the optical point-to-point device roughly with the side station, fix all three legs of the tripod on the ground. Adjust the three foot spirals of the total station to accurately align the optical collimator with the side station.
3) Using a circular level to roughly level the instrument
Adjust the height of the three legs of the tripod to center the circular leveling bubble of the total station.
4) Using a tube level to accurately level the instrument
① Rotate the instrument to make the tube level parallel to the line connecting diagonal spirals A and B. By rotating angle spirals A and B, center the horizontal bubble of the tube.
② Rotate the instrument 90 ° so that it is perpendicular to the line connecting the angle spirals A and B. Rotate the angle spiral C to center the horizontal bubble of the tube.
5) Accurate centering and leveling
By observing the optical point-to-point device, slightly loosen the central connecting screw and translate the instrument (non rotatable instrument) to accurately align the instrument with the side station. Tighten the central connecting screw again and level the instrument again. Repeat this operation until the instrument is accurately leveled and aligned.
3. Using laser alignment device for centering (optional)
1) Set up a tripod
Extend the tripod to an appropriate height, ensuring that the three legs are of equal length and open, and make the top surface of the tripod approximately horizontal and located directly above the measuring station. Support the legs of the tripod on the ground to secure one of the legs.
2) Install instruments and control points
Carefully place the instrument on the tripod, tighten the central connecting screw, and open the laser alignment device. Grasp the other two unsecured legs with both hands and adjust their positions by observing the laser spot of the collimator. When the laser spot is roughly aligned with the side station, fix all three legs of the tripod on the ground. Adjust the three foot spirals of the total station to accurately align the laser spot with the measuring station.
3) Using a circular level to roughly level the instrument
Adjust the height of the three legs of the tripod to center the circular leveling bubble of the total station.
4) Using a tube level to accurately level the instrument
① Rotate the instrument to make the tube level parallel to the line connecting diagonal spirals A and B. By rotating angle spirals A and B, center the horizontal bubble of the tube.
② Rotate the instrument 90 °so that it is perpendicular to the line connecting the angle spirals A and B. Rotate the angle spiral C to center the horizontal bubble of the tube.
5) Accurate centering and leveling
By observing the spot of the laser pointer, slightly loosen the central connecting screw and translate the instrument (non rotatable instrument) to accurately align the instrument with the side station. Tighten the central connecting screw again and level the instrument again. Repeat this operation until the instrument is accurately leveled and aligned.
6) Turn off the laser point-to-point device.
Note: Electronic bubbles can also be used instead of using a tube level to level the instrument part.
Exceeding the ± 6' range will automatically enter the electronic water bubble interface.
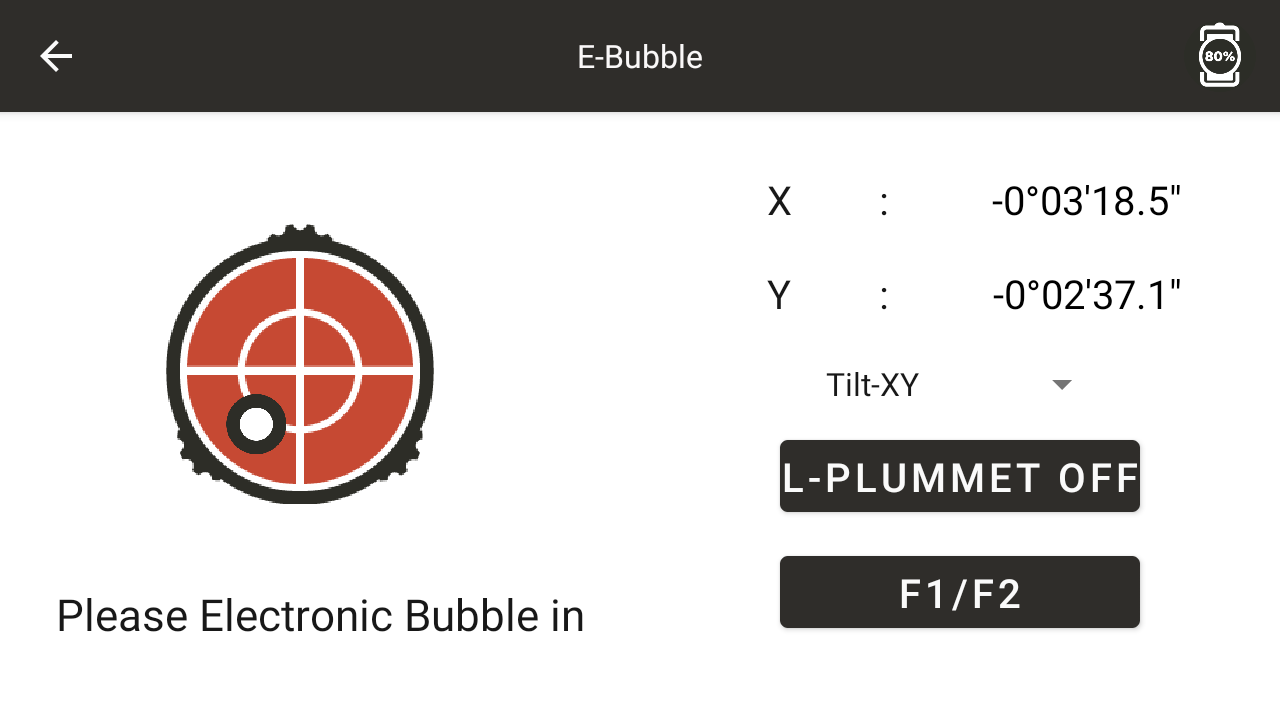
◆ X: Display the compensation value in the X direction
◆ Y: Display the compensation value in the Y direction
◆ [Compensation Off] : Turn off dual axis compensation, click to enter [Compensation X]
◆ [Compensation - X] : Open the compensation in the X direction and click to enter [Compensation - XY]
◆ [Compensation - XY] : Turn on compensation in the XY direction, click to enter [Compensation - Off]
3.4 Loading, unloading, information and charging of batteries
Battery loading and unloading
Install battery - Place the battery into the battery slot of the instrument cover plate, fasten the left and right buckles to secure it.
Battery removal - Press and hold the buckle to remove the battery.
Battery information
When the battery level is less than one cell, it means that the battery level is low. Please end the operation as soon as possible, replace the battery and charge it.
Note:
① The duration of battery operation depends on environmental conditions such as ambient temperature, charging time, and number of charges. For safety reasons, it is recommended to charge in advance or prepare some fully charged backup batteries.
② The display level of remaining battery capacity is related to the current measurement mode. In angle measurement mode, the remaining battery capacity is sufficient, but it cannot guarantee that the battery can also be used in distance measurement mode. Because the distance measurement mode consumes more power than the angle measurement mode, when switching from angle mode to distance mode, the distance measurement may sometimes be interrupted and the instrument may be turned off due to insufficient battery capacity.
Battery charging
Special charger for battery charging application, this instrument is equipped with ZY-4SL charger.
When charging, first connect the charger to the 220V power supply, remove the battery box from the instrument, and insert the charger plug into the charging socket of the battery box.
Precautions when removing the onboard battery pack:
▲ Every time the battery pack is removed, the instrument power must be turned off first, otherwise the instrument is prone to damage.
Precautions for charging:
Although the charger has an overcharge protection circuit, the plug should still be unplugged from the socket after charging is complete.
▲ Charge within the temperature range of 0 ° C to ± 45 °C, as charging may be abnormal beyond this range.
If the charger and battery are connected but the indicator light does not light up, the charger or battery may be damaged and should be repaired.
Precautions for storage:
Fully discharging the battery will shorten its lifespan.
To achieve the longest lifespan of the battery, please ensure to charge it once a month.
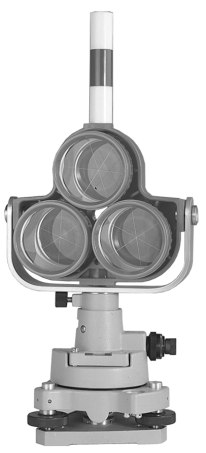
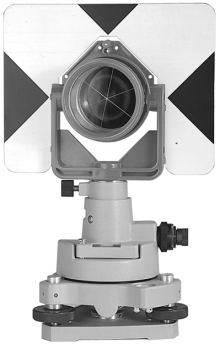
3.5 Reflective Prism
When measuring distance and other tasks in prism mode with this series of total stations, a reflective prism must be placed at the target. The reflective prism has a single (triple) prism group, which can be connected to the base and placed on the tripod through a base connector, or directly placed on the centering rod. The prism group is configured by the user according to their homework needs.
The prism set produced by our company is shown in the picture:
3.6 Disassembly of the Base
disassemble
If necessary, the triangular base can be removed from the instrument (including the reflector prism base connector using the same base). First, use a screwdriver to loosen the fixing screw of the base locking button, and then turn the locking button counterclockwise by about 180 ° to separate the instrument from the base.
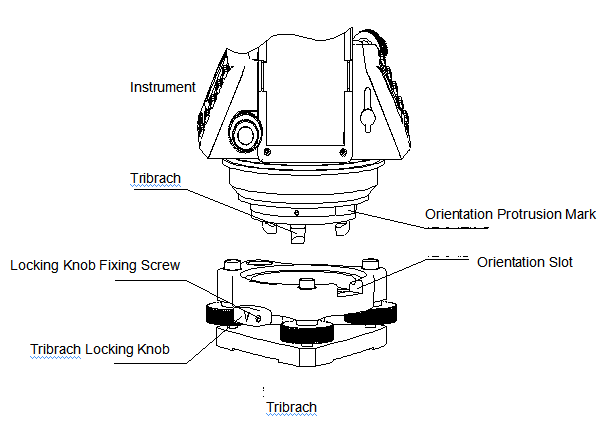
Installation
Align the orientation protrusion mark of the instrument with the orientation groove of the base, place the three fixed feet on the instrument into the holes of the base, and install the instrument on the triangular base. Rotate the locking button clockwise by about 180 ° to lock the instrument with the base, and then use a screwdriver to tighten the locking button fixing screw.
3.7 Telescope eyepiece adjustment and target calibration
Methods of targeting (for reference)
① Aim the telescope at the bright sky, rotate the eyepiece tube, focus and see the crosshair clearly (rotate the eyepiece tube counterclockwise and slowly turn it in to focus and see the crosshair clearly).
② When aiming at the top point of the triangle mark inside the coarse sight, there should be a certain distance between the eye and the sight when aiming.
③ Use a telescope focusing spiral to make the target image clear.
When the eyes move up and down or left and right at the eyepiece end and find parallax, it indicates that the focusing or eyepiece refractive power is not adjusted properly, which will affect the accuracy of observation. Careful focusing and adjustment of the program tube should be carried out to eliminate parallax.
3.8 Power on and off
Power on
1. Roughly level the instrument
2. Press and hold the power button for about 3 seconds to turn on the instrument.
Shut down
1. Press and hold the power button for about 1 second until the shutdown menu pops up
2. Try to ensure a normal shutdown as much as possible, otherwise it may result in data loss
Note: Confirm that there is sufficient battery power in the display window. When it displays "low battery power" (battery used up), the battery should be replaced or charged in a timely manner. Note that the shutdown should be carried out according to the normal shutdown operation.
During the process of data collection, do not unplug the battery without shutting down, otherwise the measurement data will be lost!!