Point Clouds
-
Point Clouds File
-
LAS Source File
-
Datasets
-
Datasets Edit
-
Datasets Operation
9.1 Point Clouds File
Click Point Clouds menu, click [New Clouds] button, then enter the name in Create Point Clouds box and click [Create].

Figure 9.1 New Clouds
After creating clouds, the new clouds will be displayed in Work Space window.
Click Point Clouds menu, click [Edit Clouds] button, to open clouds editing interface for subsequent LAS file import and point clouds datasets editing operations.
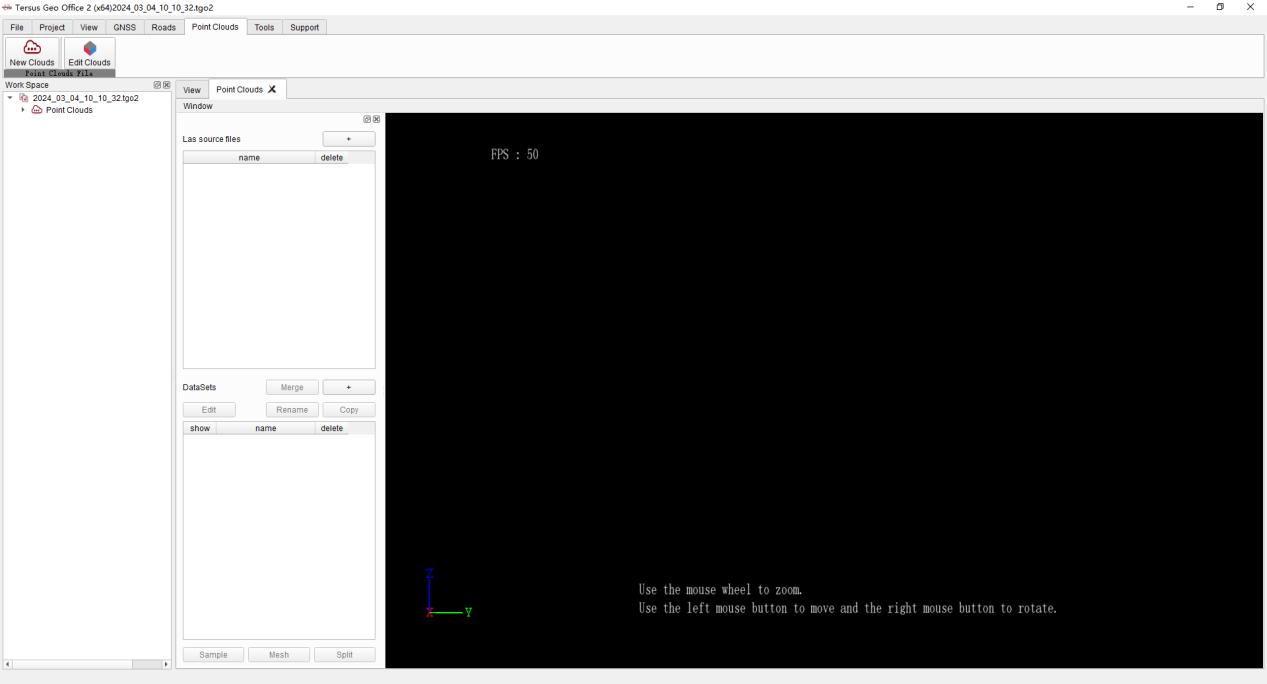
Figure 9.2 Edit Clouds
9.2 LAS Source File
Click LAS Source File [+] button to select .las files to import.
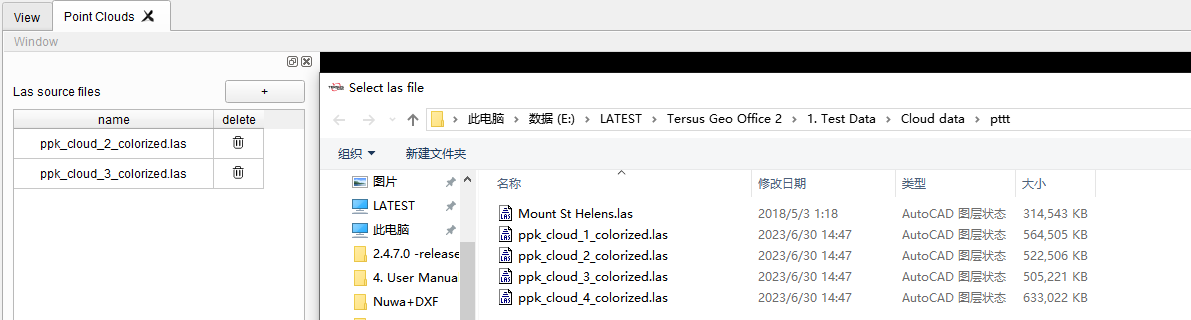
Figure 9.3 LAS File Import
After importing, the imported files will be displayed in the Las source file list. And the item could be deleted if the delete icon is clicked.
9.3 Datasets
Click Datasets [+] button, check the LAS files that need to be imported into datasets, and check the column attributes in LAS files to import. Input the name, click [OK] and wait for the import to complete.
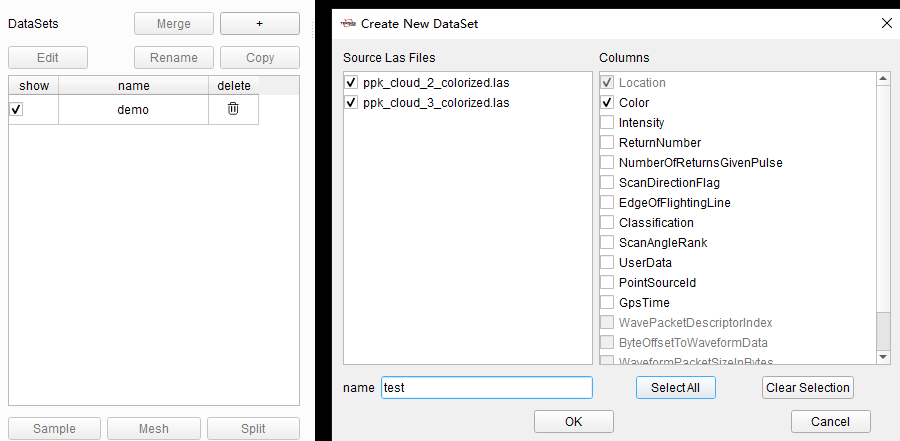
Figure 9.4 Datasets Import
After datasets importing, the imported datasets will be displayed in the datasets list. And the item could be deleted if the delete icon is clicked. The interface displays the point clouds graphic for the checked datasets. Use the mouse wheel to zoom the display. Use the left mouse button to rotate the display and the right mouse button to drag the display, to adjust the 3D display angle of point clouds.
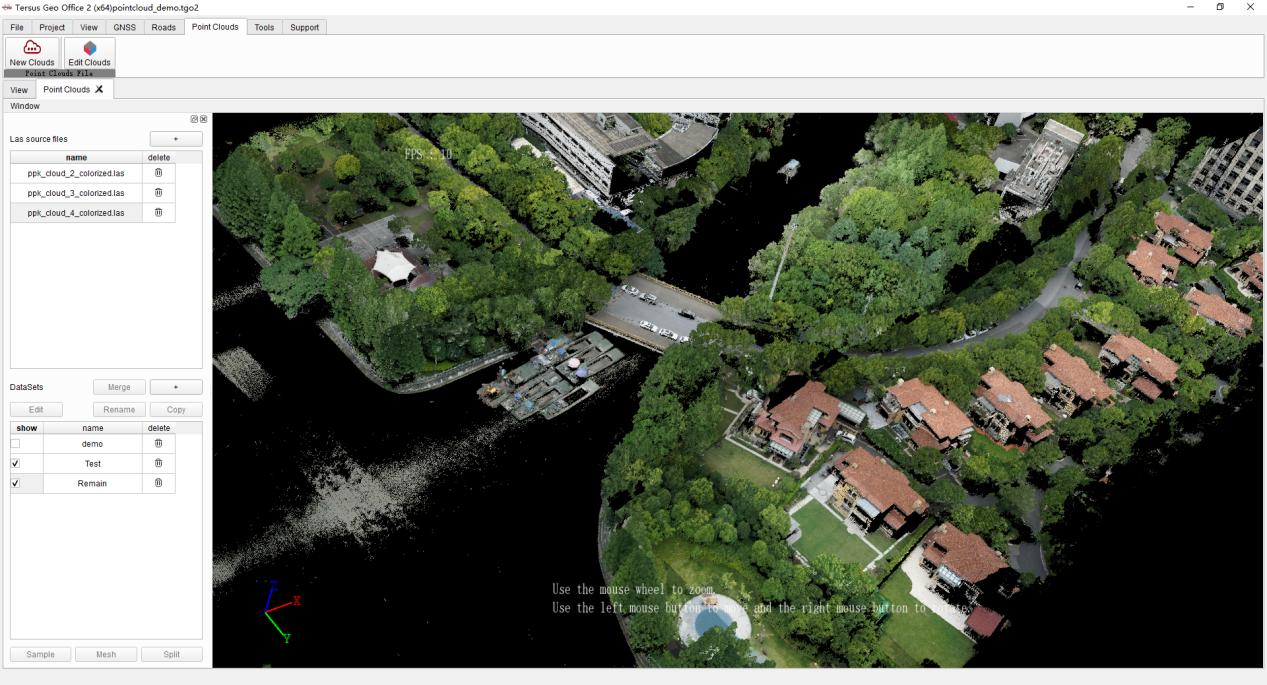
Figure 9.5 Point Clouds Display
In datasets list, select item and lick [Rename] to change the name of selected item.
Select item and click [Copy] to copy the selected item, avoiding subsequent edits affecting the original dataset.
Select two or more datasets, click [Merge] and enter the name of merged datasets to merge LAS data contained in the two datasets into one dataset.

Figure 9.6 Datasets Merge
9.4 Datasets Edit
Select dataset and click [Edit] button, open Edit DataSet dialog to edit selected dataset.
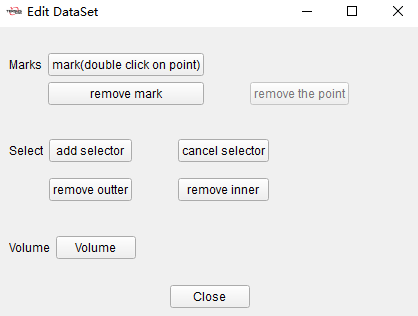
Figure 9.7 Edit DataSet
Click [Mark] button, and double click on point in point clouds to get coordinates and other information.

Figure 9.8 Mark Point
Click [Add Selector] button, input the center point and size of box, or input center point and radius of sphere, a selector will be displayed on point clouds, to remove the outer part or inner part.
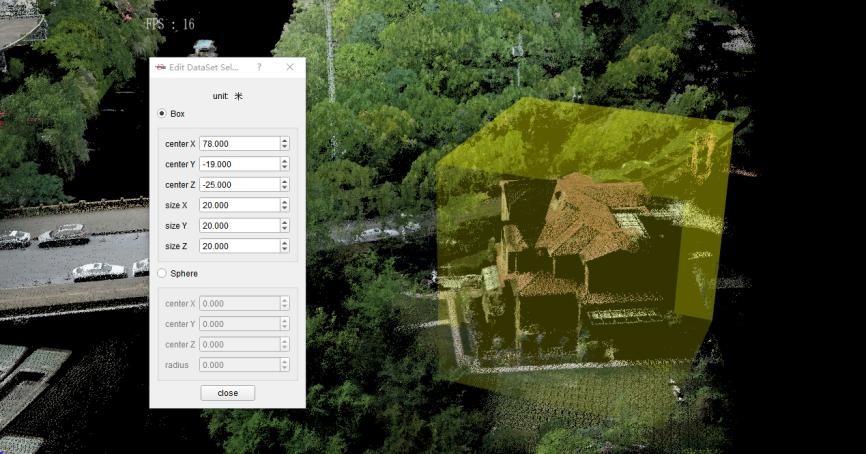
Figure 9.9 Selector Display
Click [Volume] button, to make DTM first in Volume dialog.
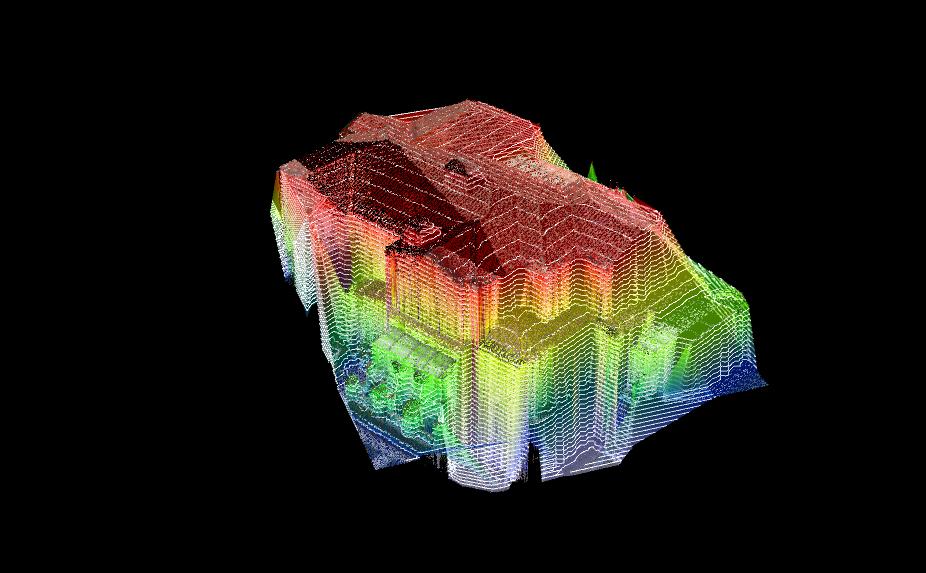
Figure 9.10 Make DTM
Then click Areas [+] button, select item in areas list, click [begin select], and double click on point clouds to create the boundary. Input fixed target height or select average height as the target height, software will calculate and show the dig and cut part.
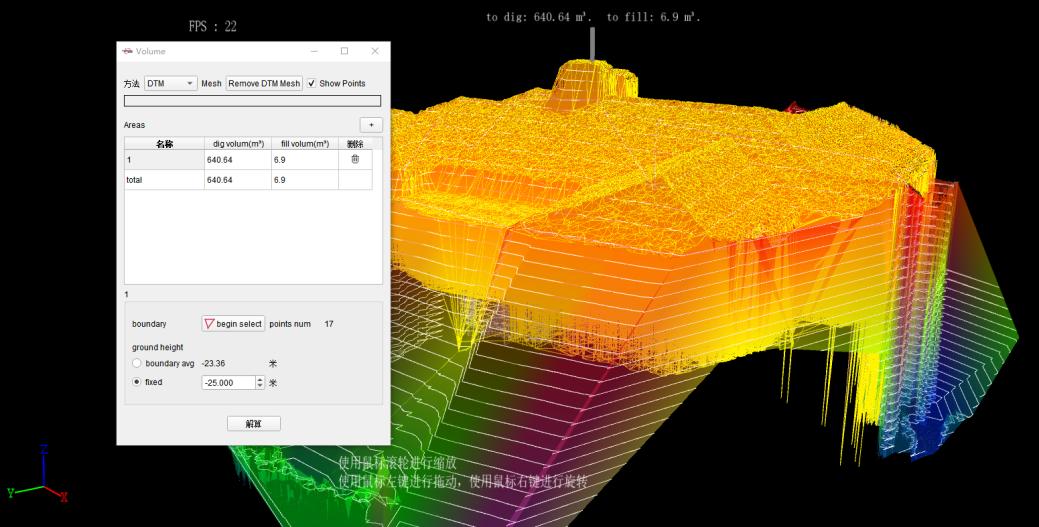
Figure 9.11 Volume Calculation
9.5 Datasets Operation
Under the datasets list, click [Sample] button to open sample dialog. Select function, then software will sample the point clouds in dataset according to configured target percents, and save the result as a new dataset.

Figure 9.12 Sample
Click [Mesh] button, select function in dialog to make Mesh for point clouds in dataset and save the result as a new dataset.
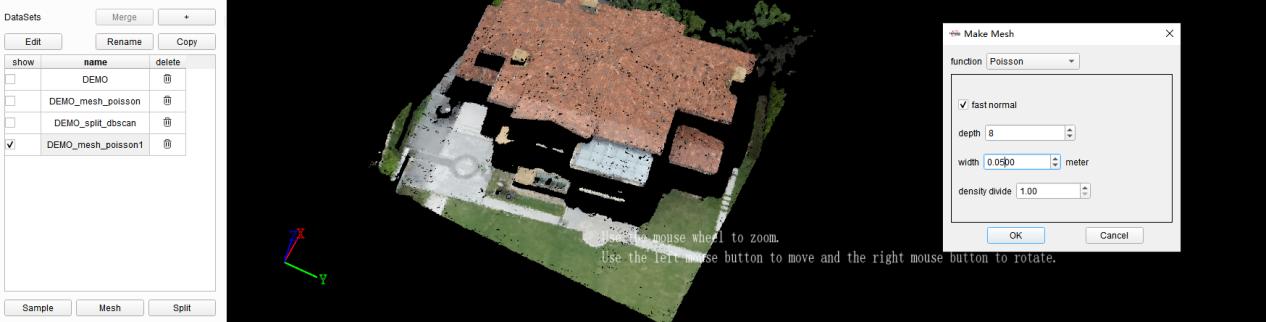
Figure 9.13 Mesh
Click [Split] button, select function in dialog to split point clouds in dataset and save the result as a new dataset.

Figure 9.14 Split