File
-
New Project
-
Open & Close
-
Save & Export
-
Project Manager
-
Exit Software
3.1 New Project
Click File menu, click [New] button, enter the New Project interface.
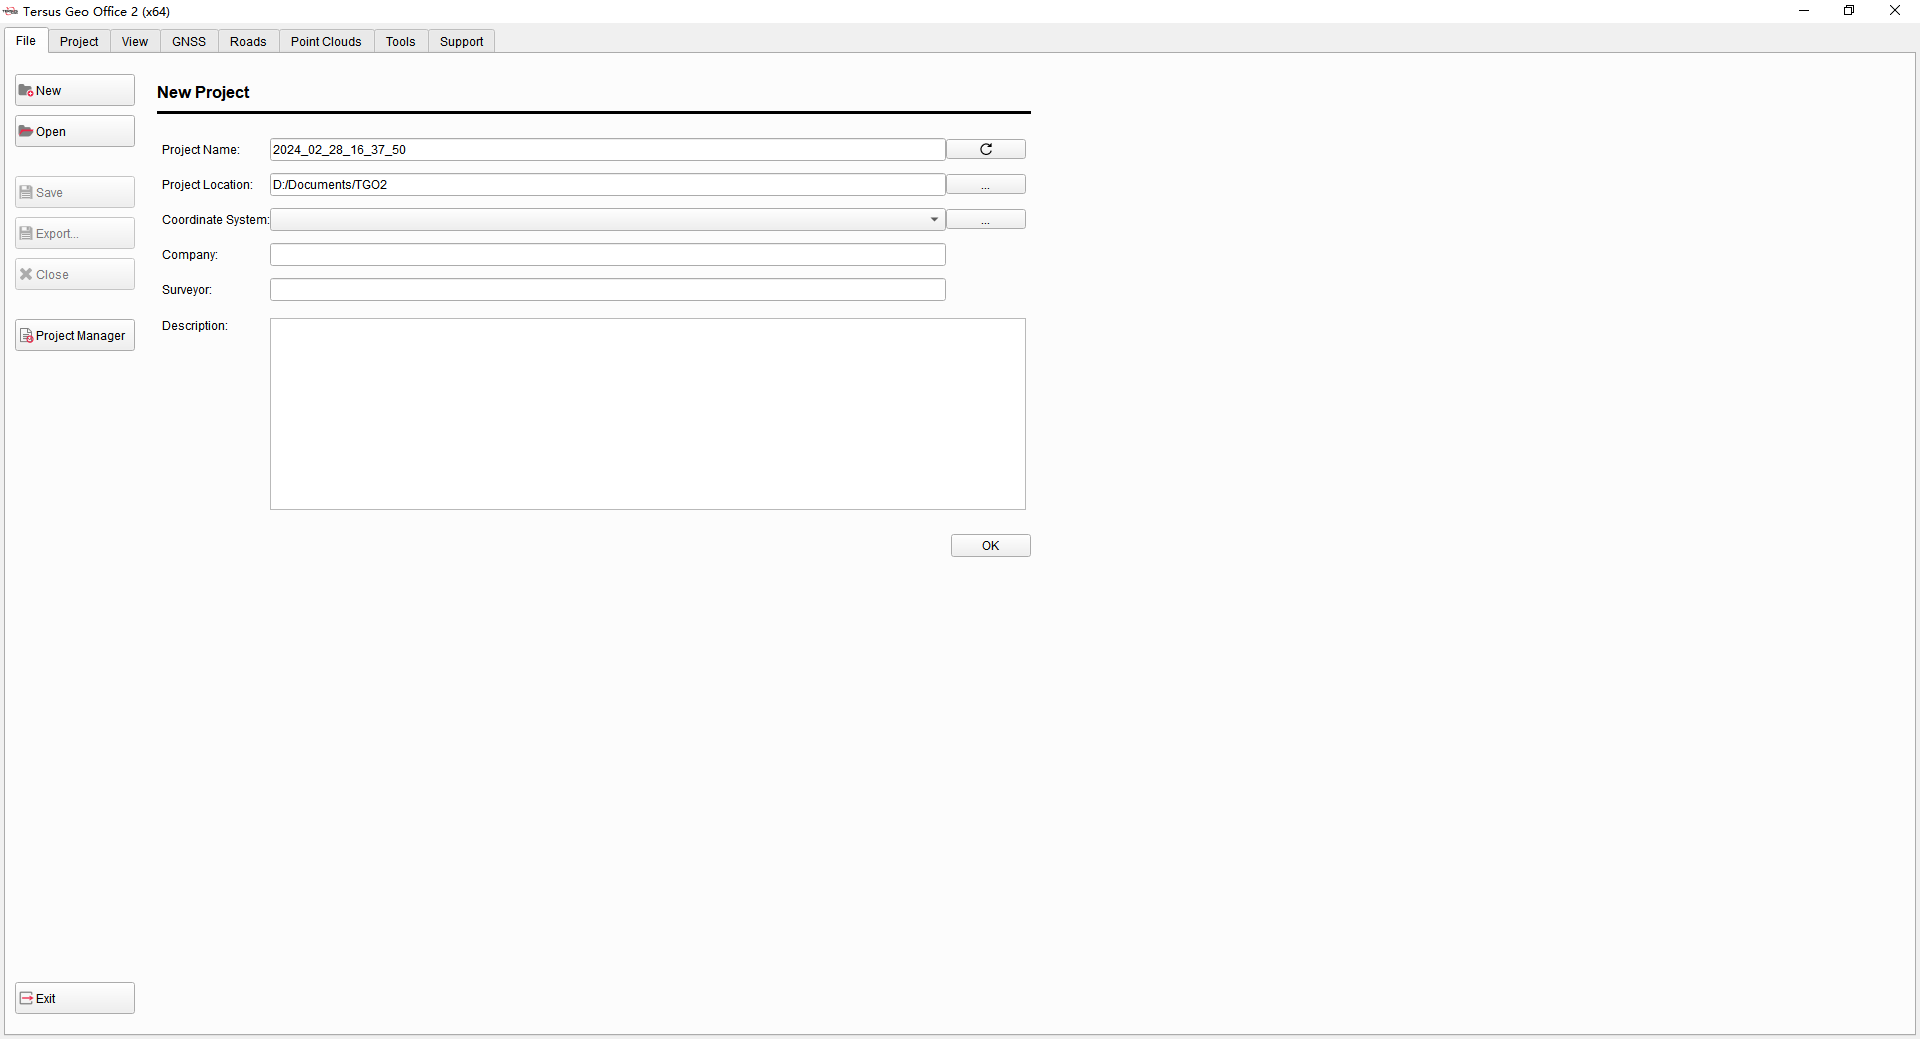
Figure 3.1 New Project Interface
| Project Name | |
|---|---|
| Project Location | |
| Coordinate System | When creating the new project, if you select none as the coordinate system, the software will automatically create a coordinate system with the name of WGS84, which uses WGS84 as the ellipsoid and Transverse Mercator as the projection after importing GNSS data. |
| Company | Company information for new project, non-required fields |
| Surveyor | Surveyor information for new project, non-required fields |
| Description | Description information for new project, non-required fields |
3.2 Open & Close
Click File menu, click [Open] button, select the .tgo2 project file in the local path to open. If a project is currently opened, close the current project first then open another project.
Click File menu, click [Close] button, to close currently opened project. If no project is opened, the button can not be clicked.
3.3 Save & Export
Click File menu, click [Save] button, to save currently opened project.
Click File menu, click [Export] button, select the local path to export currently opened project to another path.
If no project is opened, the buttons can not be clicked.
3.4 Project Manager
Click File menu, click [Project Manager] button, to display the list of projects.
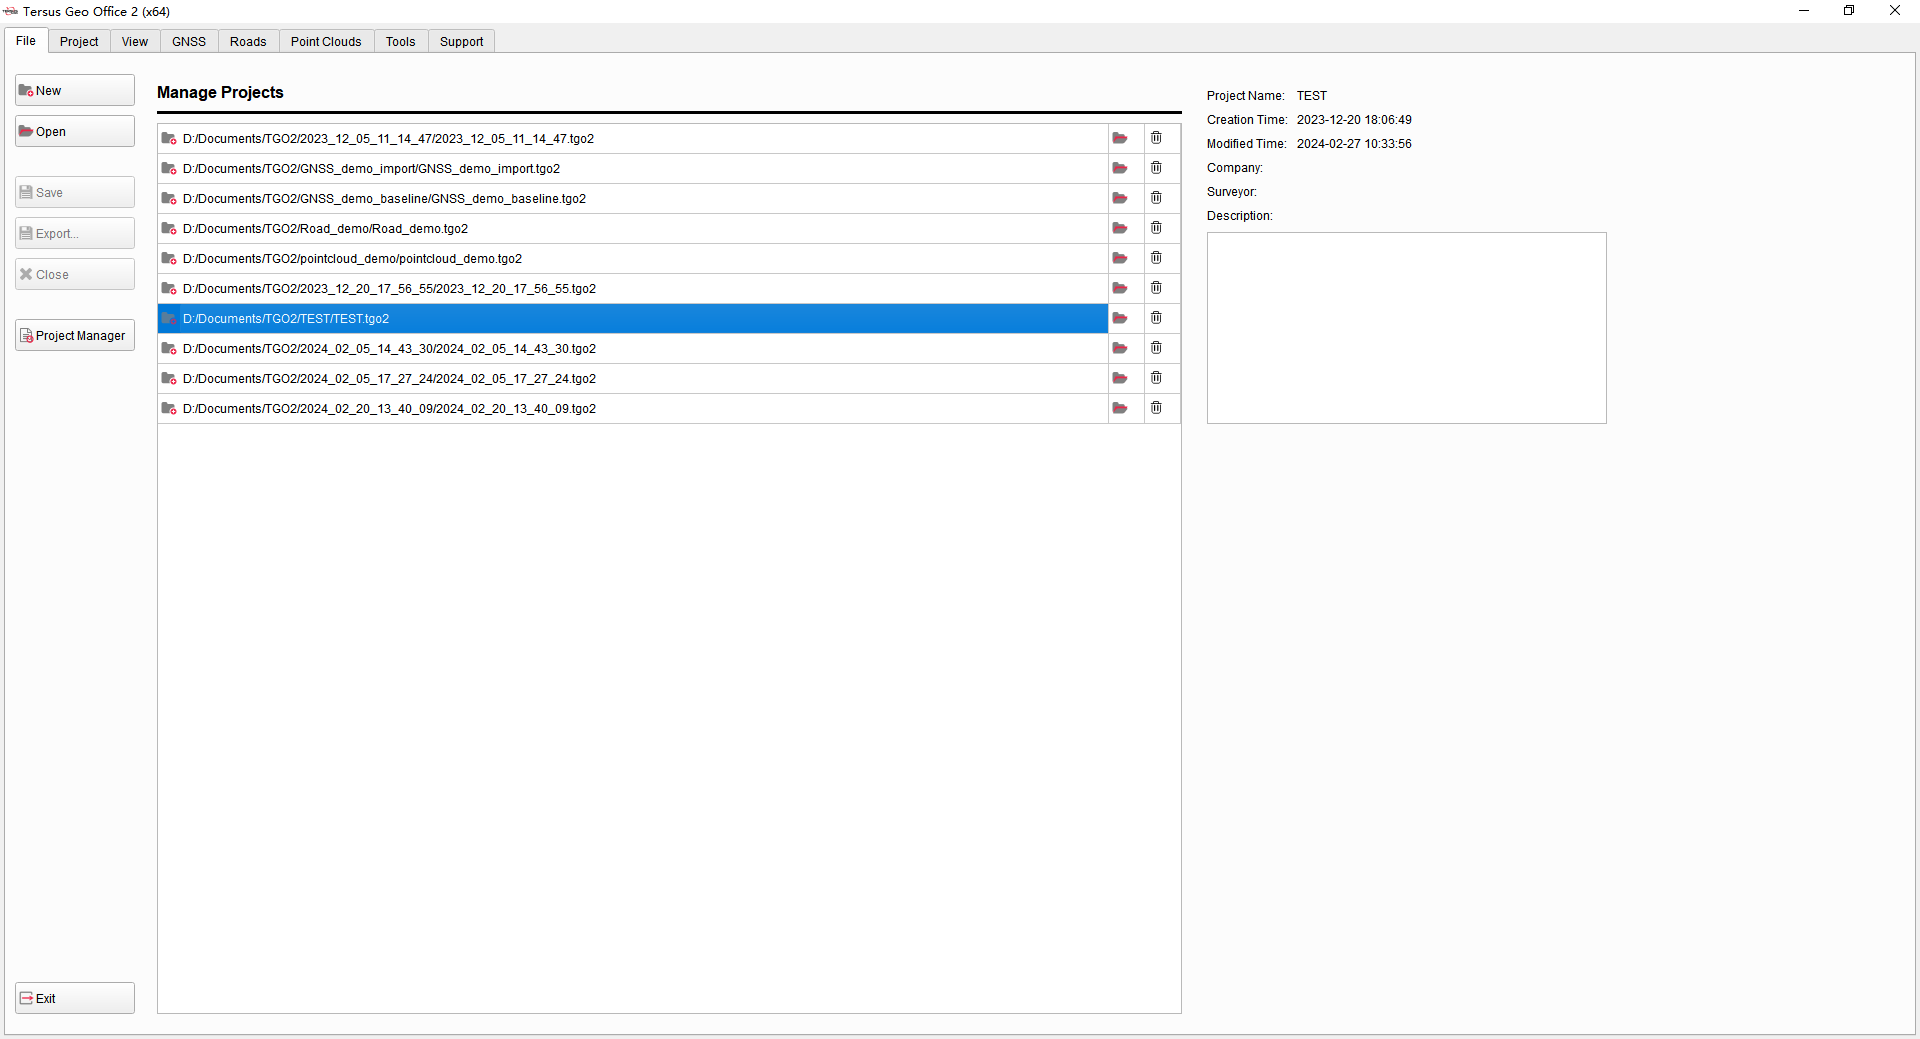
Figure 3.2 Project List Interface
Click project in the list to show the project information on the right side.
Double click project in the list to open the project.
Click the folder icon  in list to open the folder where the project data is located.
Click the delete icon  in list to remove the project from the list or directly delete the project folder and all data of the project.
3.5 Exit Software
Click File menu, click [Exit] button, to close the currently opened project and exit Tersus Geo Office 2 software.