Data Collection
Operation APP Installation
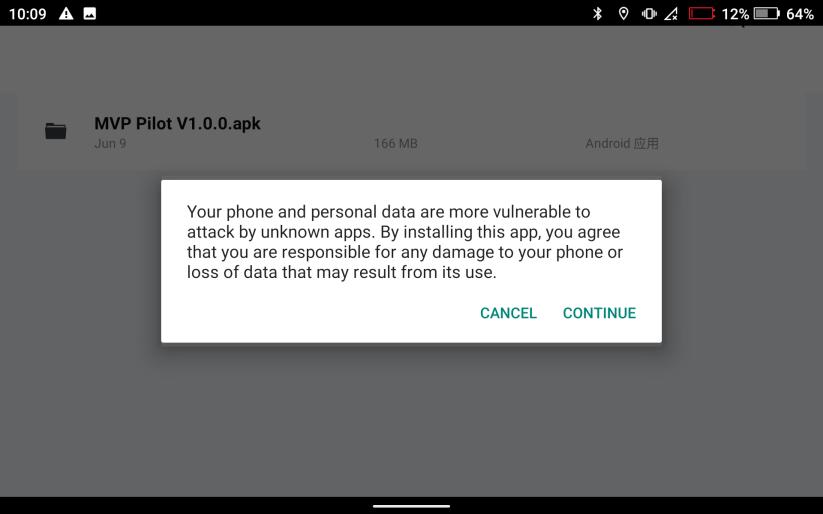
Insert the TF card or USB drive into the M300 remote controller, locate the control software installation package "MVP Pilot" on the TF card, and click to install.
In the pop-up permissions dialog box, grant the necessary permissions required by the software. If permissions are not granted, the software may fail to install successfully.
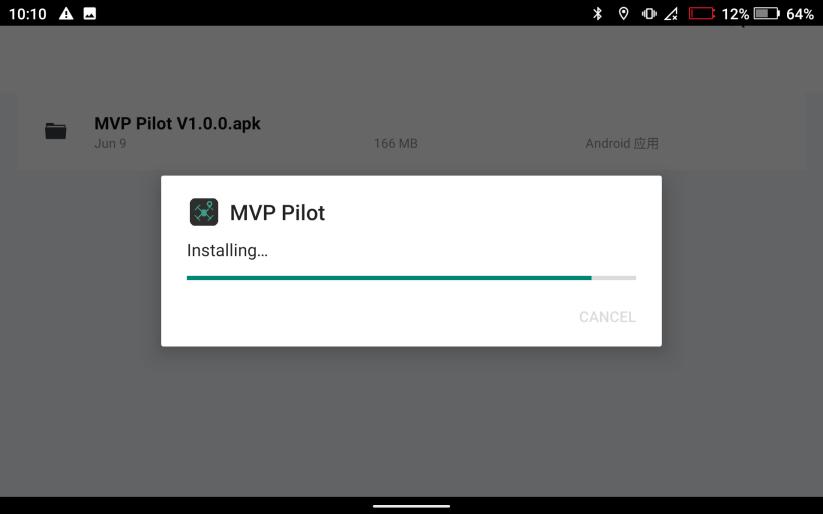
Click "Continue Installation" and wait for the software installation to complete.
Flight Mission Planning
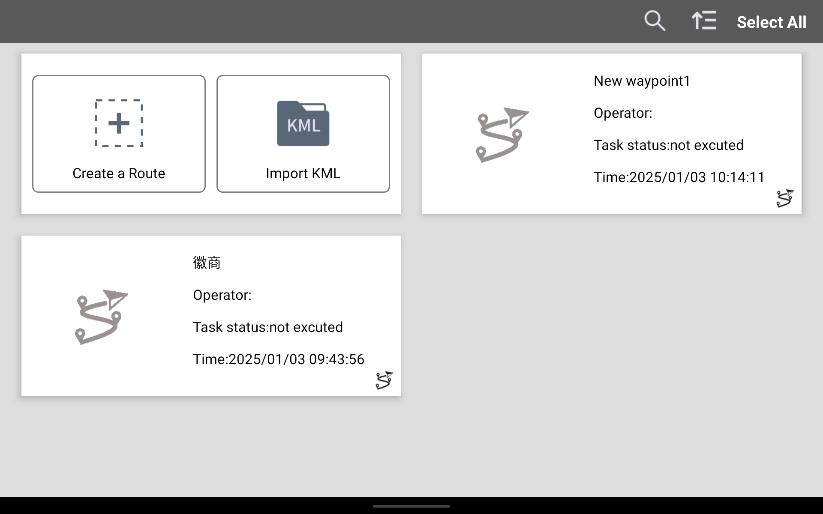
Click the icon to open the control software. In the interface, you can choose between two modes: "Create Flight Path" and "Import KML."
Creating Flight Route Mode
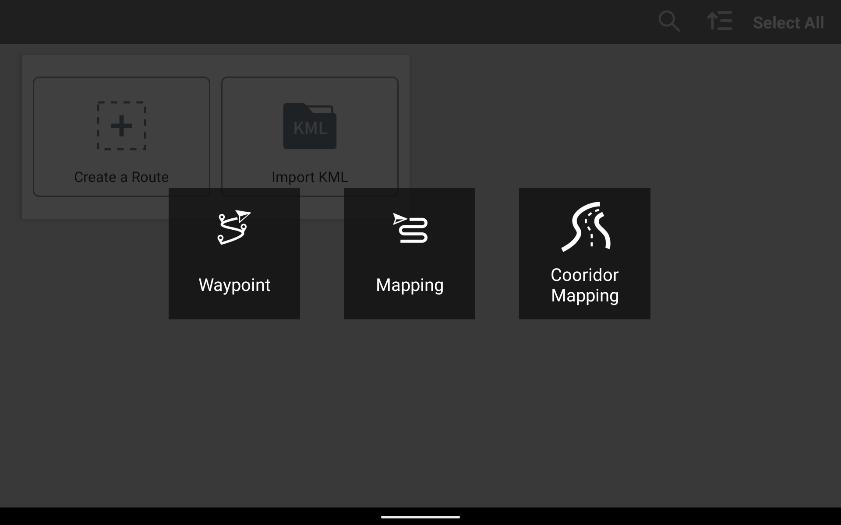
In "Create Flight Path" mode, three task modes can be selected: "Waypoint Flight," "Mapping Aerial Photography," and "Strip Flight."
Waypoint Flight"
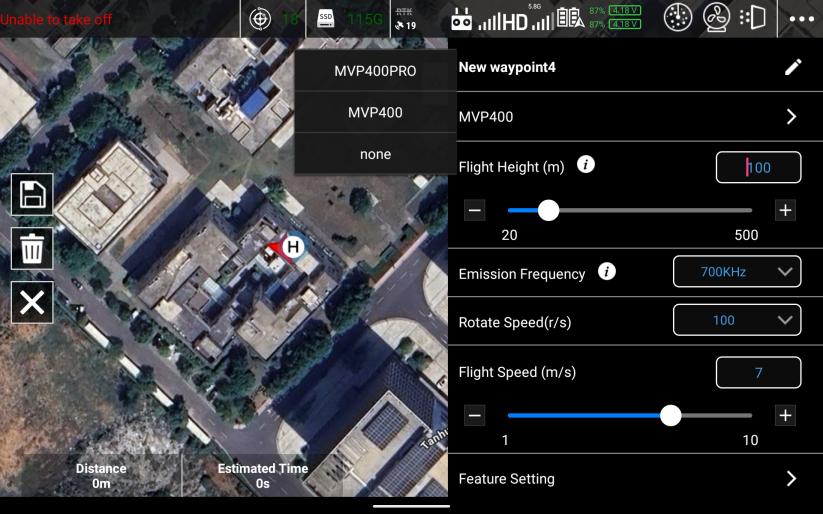
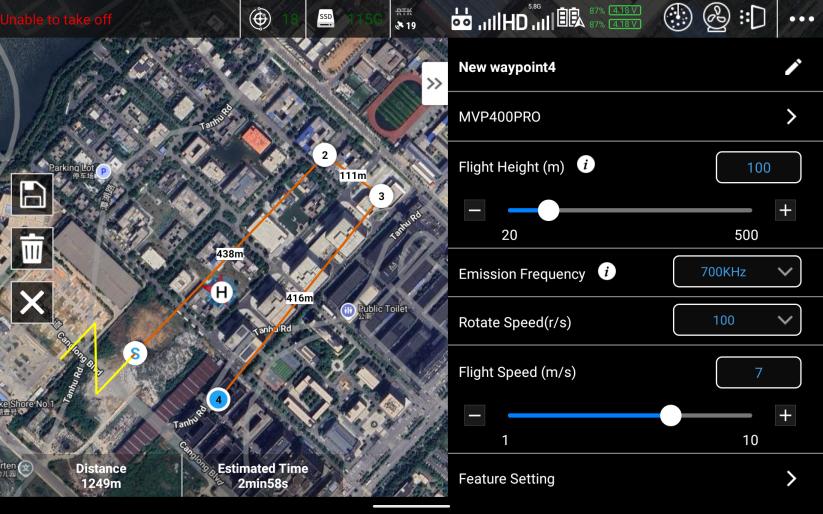
The operation method for Waypoint Flight mode is as follows:
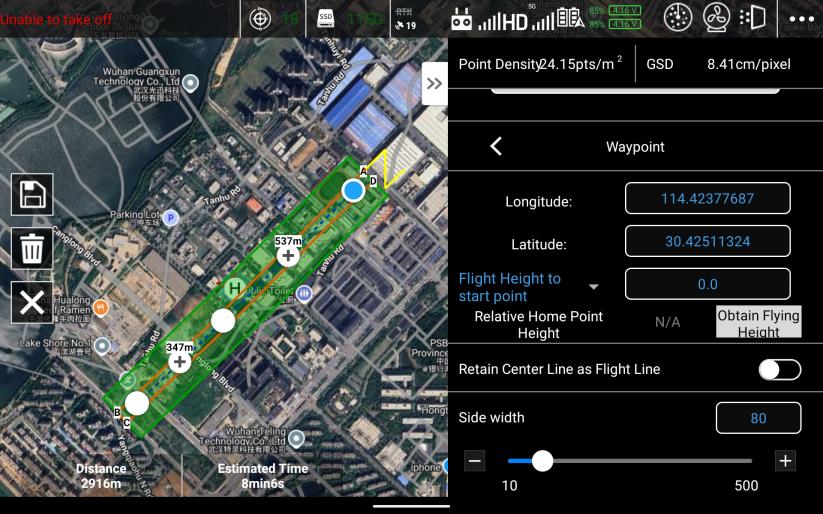
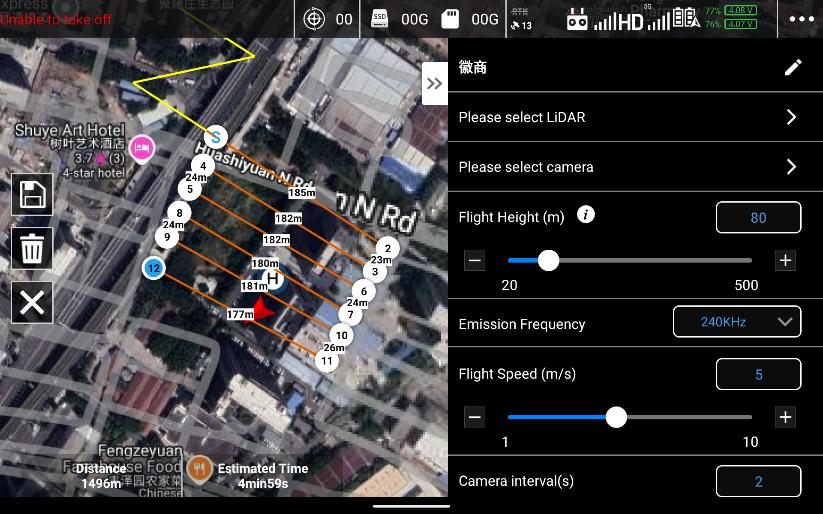
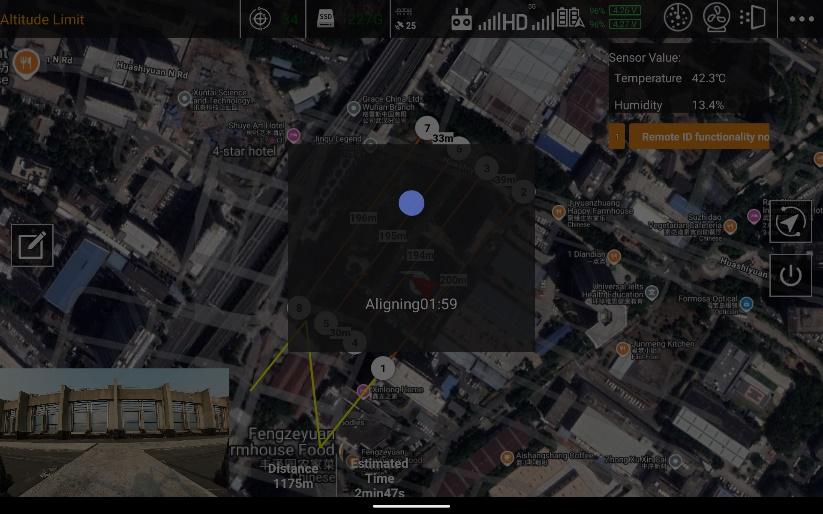
Manually click on the map to add waypoints, and the drone will fly according to the order of the waypoints. After selecting a waypoint by clicking on it, press and hold the waypoint to drag it to a new location. Once the flight path is set, open the right-side menu, where the directional buttons at the bottom can also fine-tune the waypoint positions. In the menu interface, select the corresponding lidar model (if the device is already connected, the app will automatically recognize the model). Set the flight altitude, flight speed, emission frequency, scanning angle, and actions after the flight path is completed according to your needs.

Click" "to save the flying route
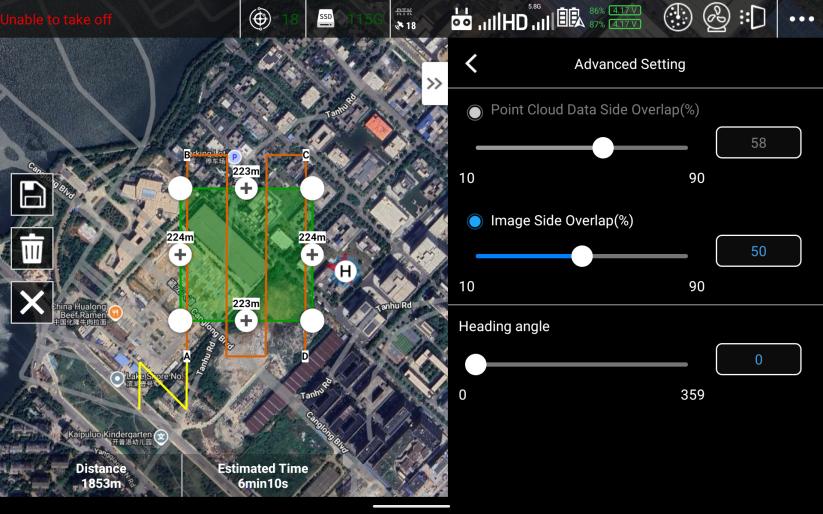
Mapping Aerial Photography"
Operation of "Mapping Aerial Photography" mode:
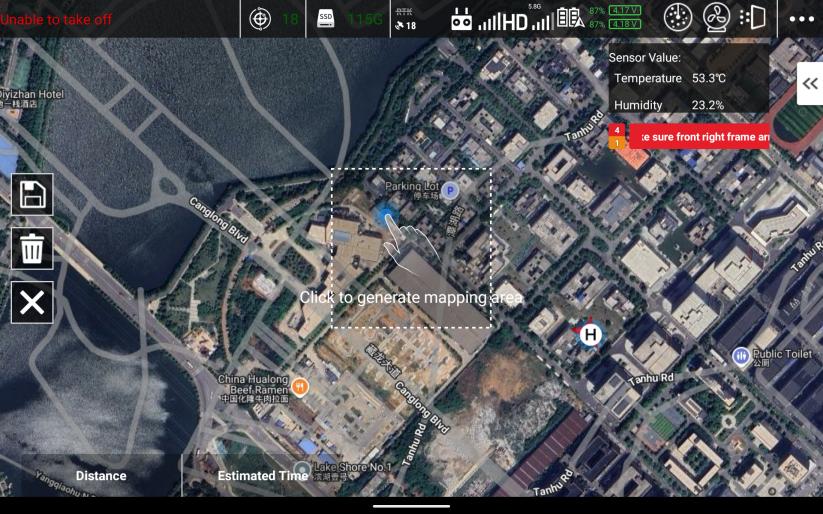
Manually select a task area on the map. Press and hold the corner points of the area to drag them and modify the boundary positions. Click the "+" symbol between two corner points to add a new corner point between them to adjust the task area.
Manually select a task area on the map. Press and hold the corner points of the area to drag them and modify the boundary positions. Click the "+" symbol between two corner points to add a new corner point between them to adjust the task area.
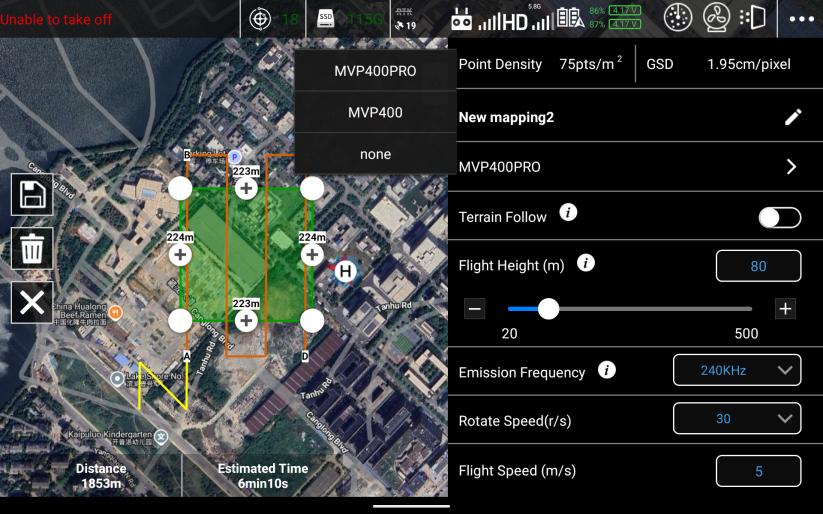
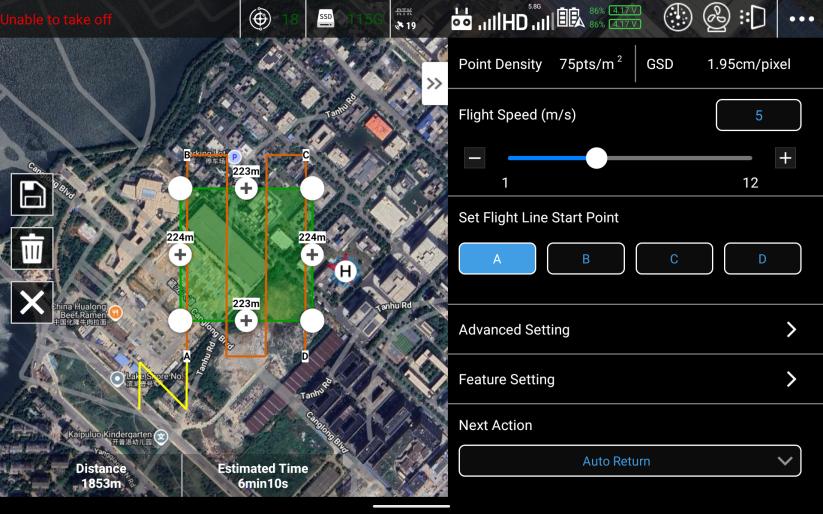
After setting the overlap, adjust the flight altitude. The app will automatically calculate the flight path intervals and generate the flight route based on your overlap settings. Depending on the takeoff point orientation, select the entry point ("A," "B," "C," or "D"). Choose the appropriate flight speed.
Click" "to save the flying route
Strip Flight"
In Strip Flight mode, you can create a centerline by selecting points on the
map, or you can use an imported KML file to generate the centerline.

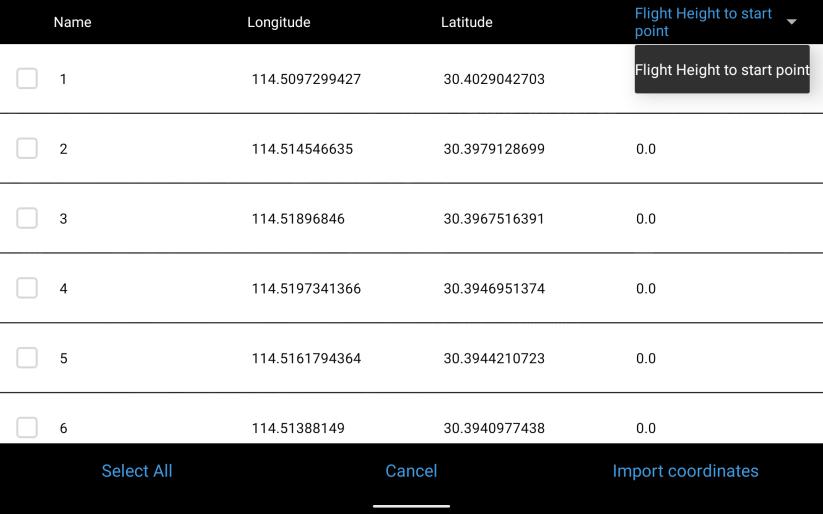
Select to import coordinate points, find the path where the KML file is stored in the remote controller's internal storage, choose the corresponding KML file, select the points to import, define the elevation of the points, and then import.
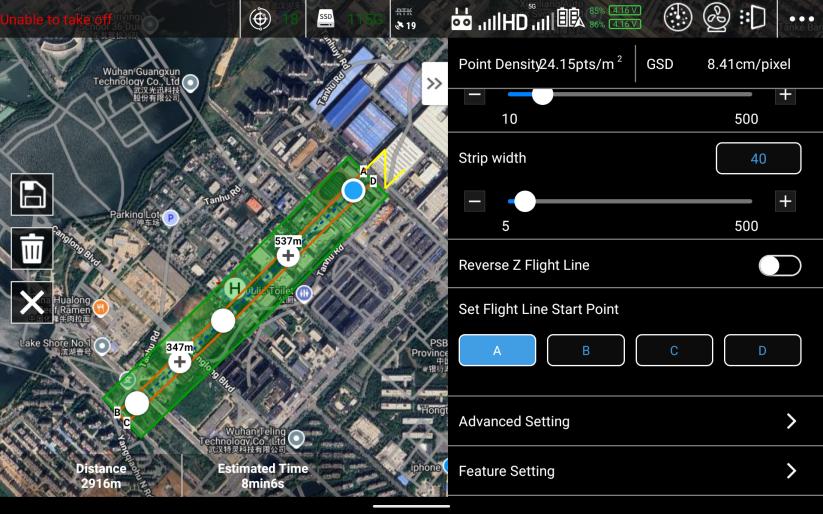
Select the appropriate flight speed and the required single-side expansion width.


You can choose whether to keep the centerline.
When obtaining the takeoff point's altitude, the local DEM (Digital Elevation Model) must be placed in the "Download" folder, and the remote controller must be connected to the internet to obtain the aircraft's position.
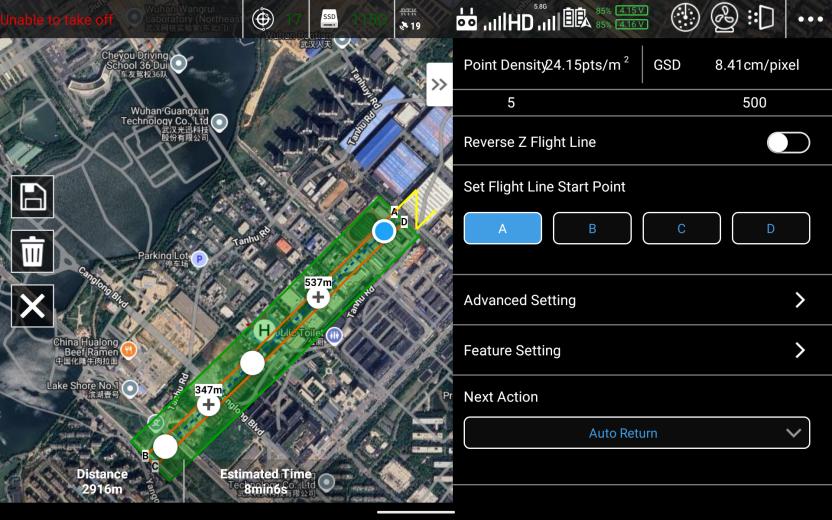
Similar to "Mapping Aerial Photography" "Strip Flight" also allows you to select four positions (A/B/C/D) to start the flight path. If the dynamically aligned flight path is too close to a building, you can choose "Reverse Z-pattern" to change the alignment direction of the flight path.
Import KML
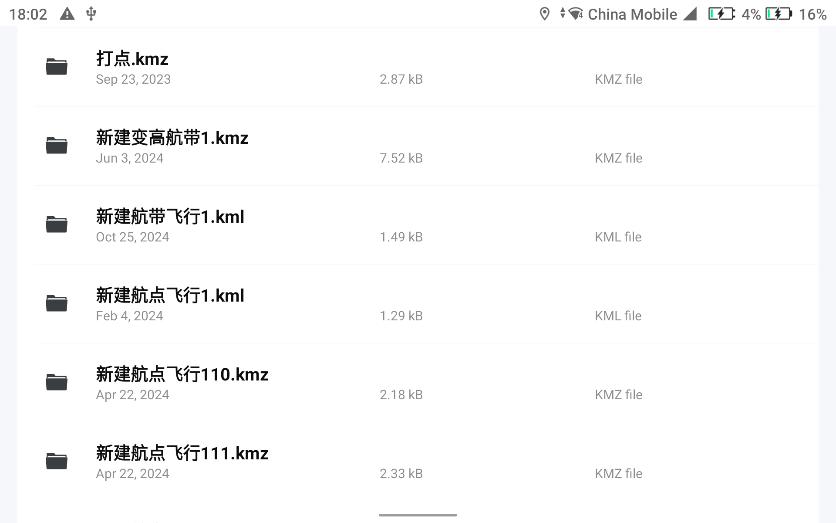
Before creating a new flight path using the "Import KML" mode, copy the KML file to the M300 remote controller: Local Storage---0---Download directory.
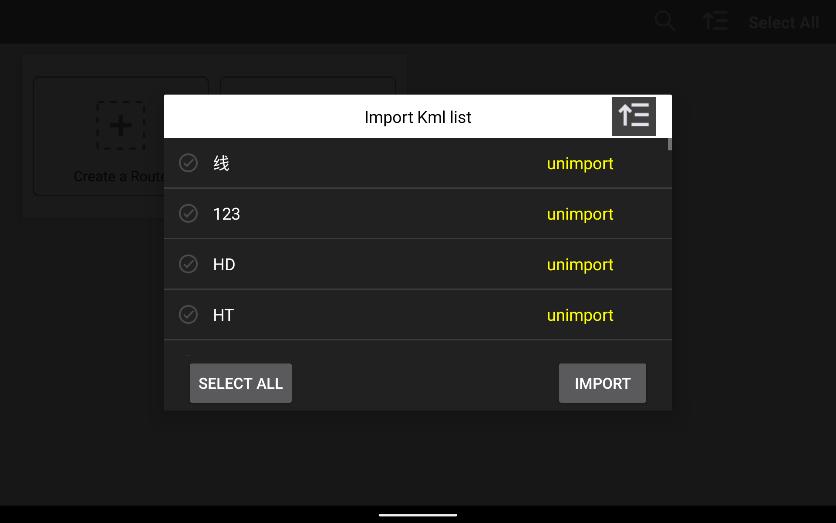
Open the app, click "Import KML," and the app will recognize the KML files in the directory. Select the required KML file and click "Import."
Device Control
Software Interface
Basic Interface
-
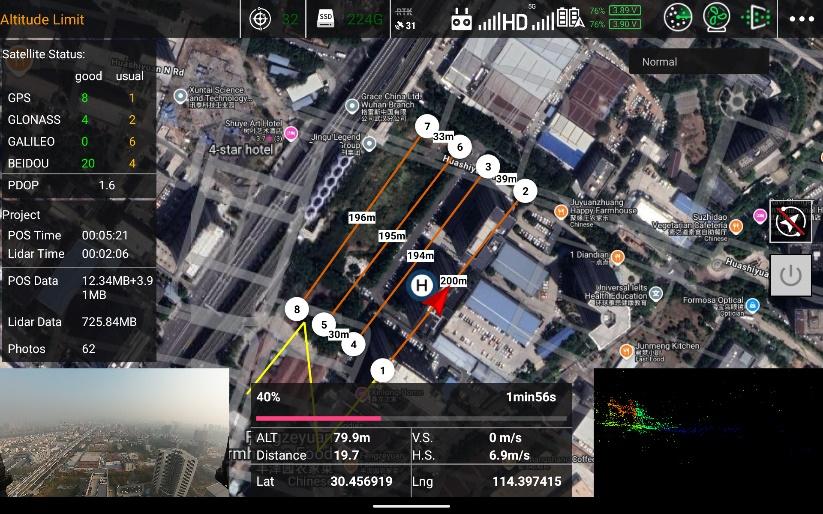
Drone Status.
-
LiDAR Satellite Count.
-
Remaining Storage Capacity.
-
Drone Satellite Count, Remote Control Signal Strength, Video Transmission Signal Strength, and Drone Battery Level.
-
POS Collection Status, LiDAR Internal Motor Rotation Status, and Point Cloud Data Collection Status.
-
Settings Menu.
-
One-Click Start/Stop for Point Cloud Project.
-
Flight Path Parameters and Execution Status.
-
Drone FPV Camera View.
-
Project Information: POS Data Size, Point Cloud Data Size, and Number of Photos.
-
LiDAR Satellite Reception Status: Satellite Count---displays current satellite signal quality and used positioning systems; PDOP---3D (spatial) Position Dilution of Precision.
-
Real-Time Point Cloud Preview.
Device Menu Interface
-
Drone Settings.
-
Drone Obstacle Avoidance System Settings.
-
Drone Battery Warning Settings.
-
Drone RTK Positioning Settings.
-
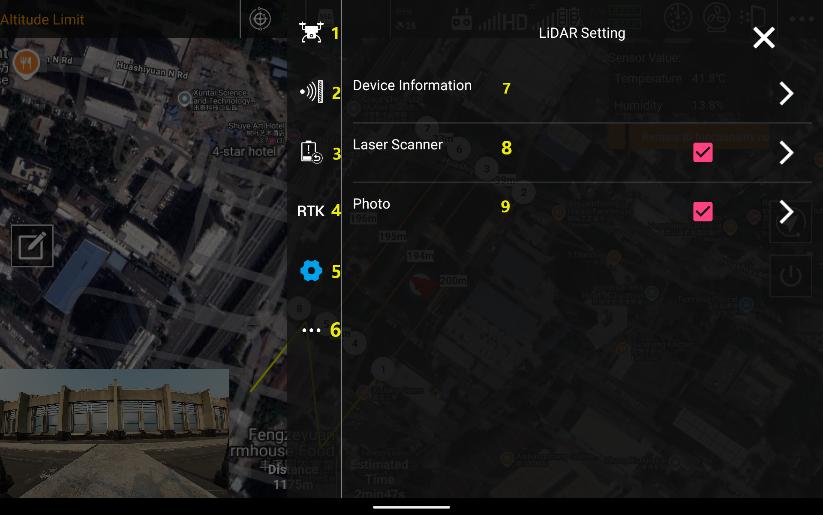
LiDAR Settings.
-
Other Settings.
-
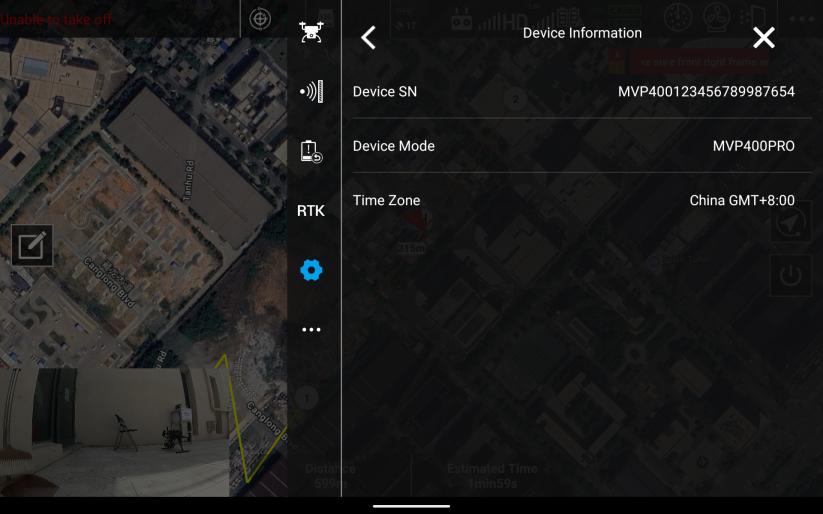
LiDAR Device Information.
-
LiDAR Carrier Configuration File Selection.
-
LiDAR Scanner Parameter Settings: Includes Real-Time Point Cloud and Radar Protection Function Settings.
-
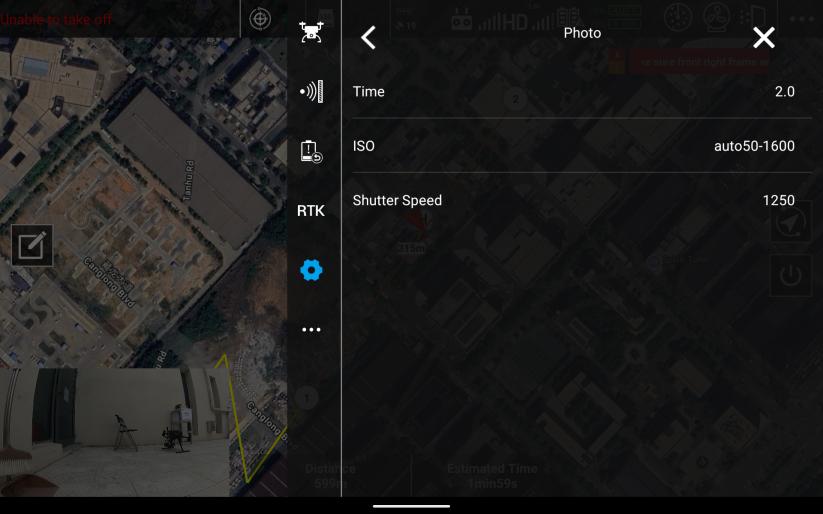
Camera Parameter Settings.
-
Turn Off LiDAR.
Device Information Interface
Displays detailed device information, including system status, firmware version, and operational parameters.
Camera Settings Interface
Provides configuration options for camera parameters, such as resolution, exposure, and shooting modes, ensuring alignment with LiDAR data collection.
Data Acquisition
Flight Path Planning
Use the APP's flight path planning function or import KML files to
Select Flight Path
Select a pre-planned task from the list of available flight paths.
Start Project
Click the "  " button to automatically start recording POS data and begin the project.

-
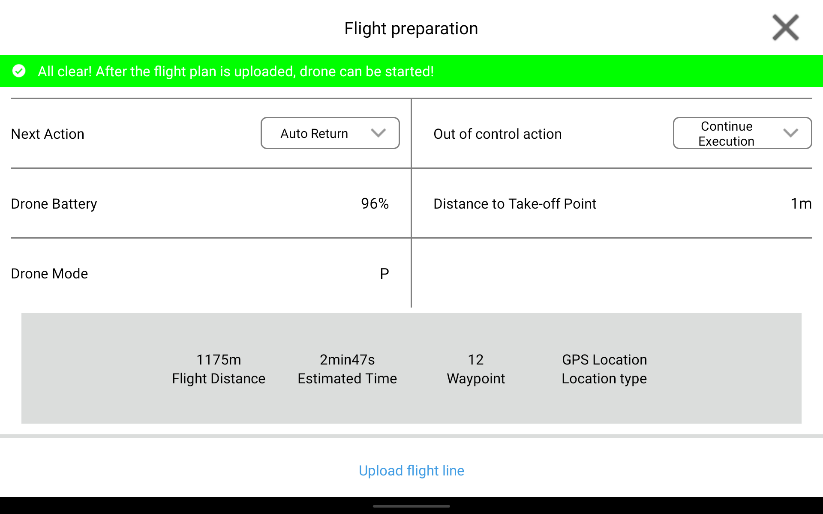
Select the appropriate actions for completing the flight path and handling remote controller disconnection, then click Upload Flight Path.
-
After the flight path upload is complete, ensure all personnel move away from the drone and confirm the area is free of obstacles. Then, click Start Execution.
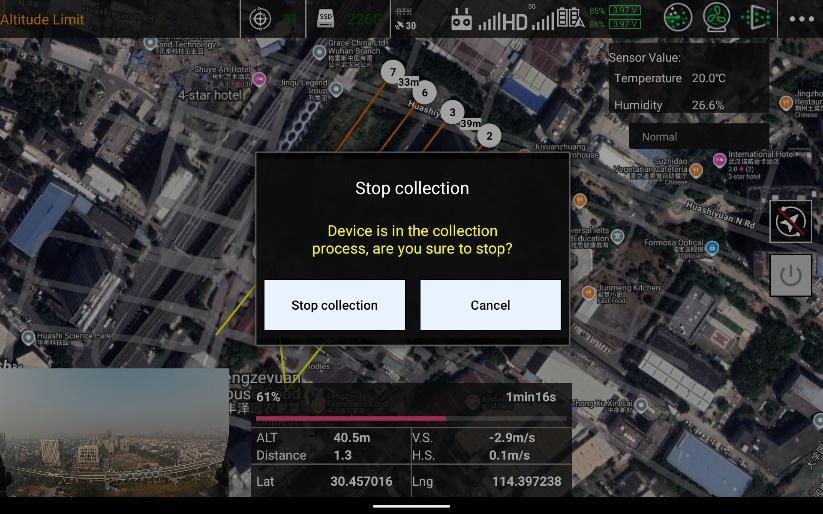
End Project

Once the flight path is completed, click the " " button to end the mission.
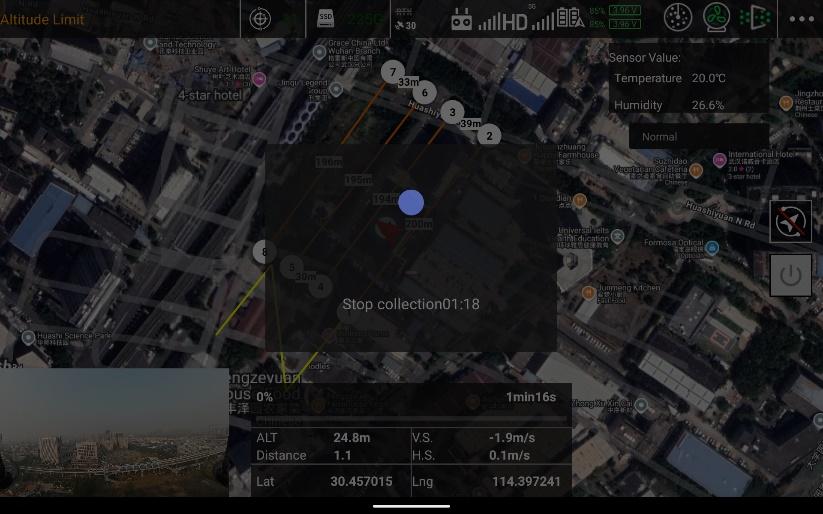
The system will display a confirmation window. In the confirmation window, click "Stop Collection," and the device will stop recording data and automatically perform dynamic alignment to finalize the mission.